Create a customer
TL;DR - Click Create customer, choose business or individual, fill in name + country + email, then set per-rail fee markups. Submit and Magma sends a KYC / KYB link to the customer's email.
Who can do this
Admin and operate. View users see the button as disabled.
Step 1 - Type and details
Pick the type
Two icon toggles: Business or Individual. This selection determines which name fields appear in the rest of the wizard and cannot be changed after submission.
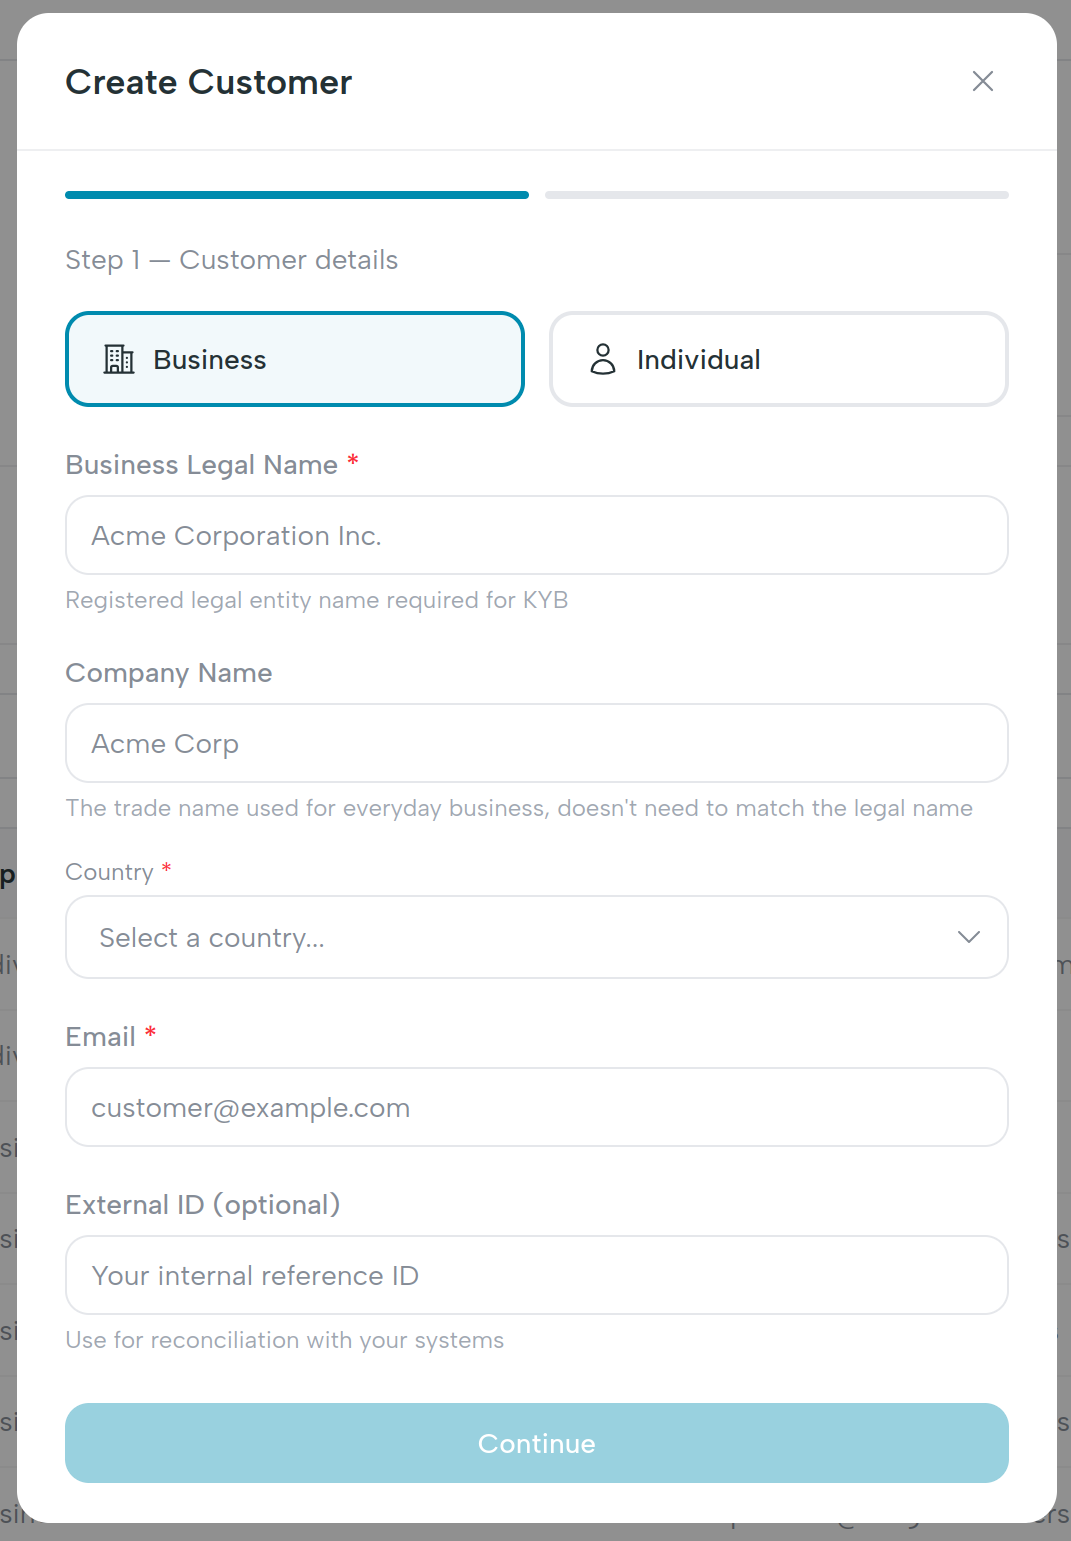
Fill in the form
| Field | Required | Notes |
|---|---|---|
| Business legal name (business only) | Yes | The legal entity name as it appears on incorporation documents. |
| Company name (business only) | No | Trading / brand name if different from the legal name. |
| First name + Last name (individual only) | Yes | The natural person's full name. |
| Country | Yes | Country of incorporation (business) or residence (individual). |
| Yes | Where Magma sends the KYC / KYB link. Must be reachable by the customer. | |
| External ID | No | Your own reconciliation identifier - e.g. the customer's ID in your CRM. |
Validation runs on blur; the Continue button is disabled until all required fields are valid.
Step 2 - Fees
The second step shows a fee table with one row per payment rail:
| Rail | Platform base fee (read-only) | Your markup |
|---|---|---|
| ACH | Set by Magma | Editable: fixed + percentage |
| Wire | Set by Magma | Editable: fixed + percentage |
| SWIFT | Set by Magma | Editable: fixed + percentage |
| FX | Set by Magma | Editable: fixed + percentage |
| Internal transfers | Set by Magma | Editable: fixed + percentage |
The platform base fee is what Magma charges your fintech. It is fixed by
contract and visible here for transparency. The markup is what you add
on top - what your customer pays is base + markup. You can leave a markup
at zero and edit it later.
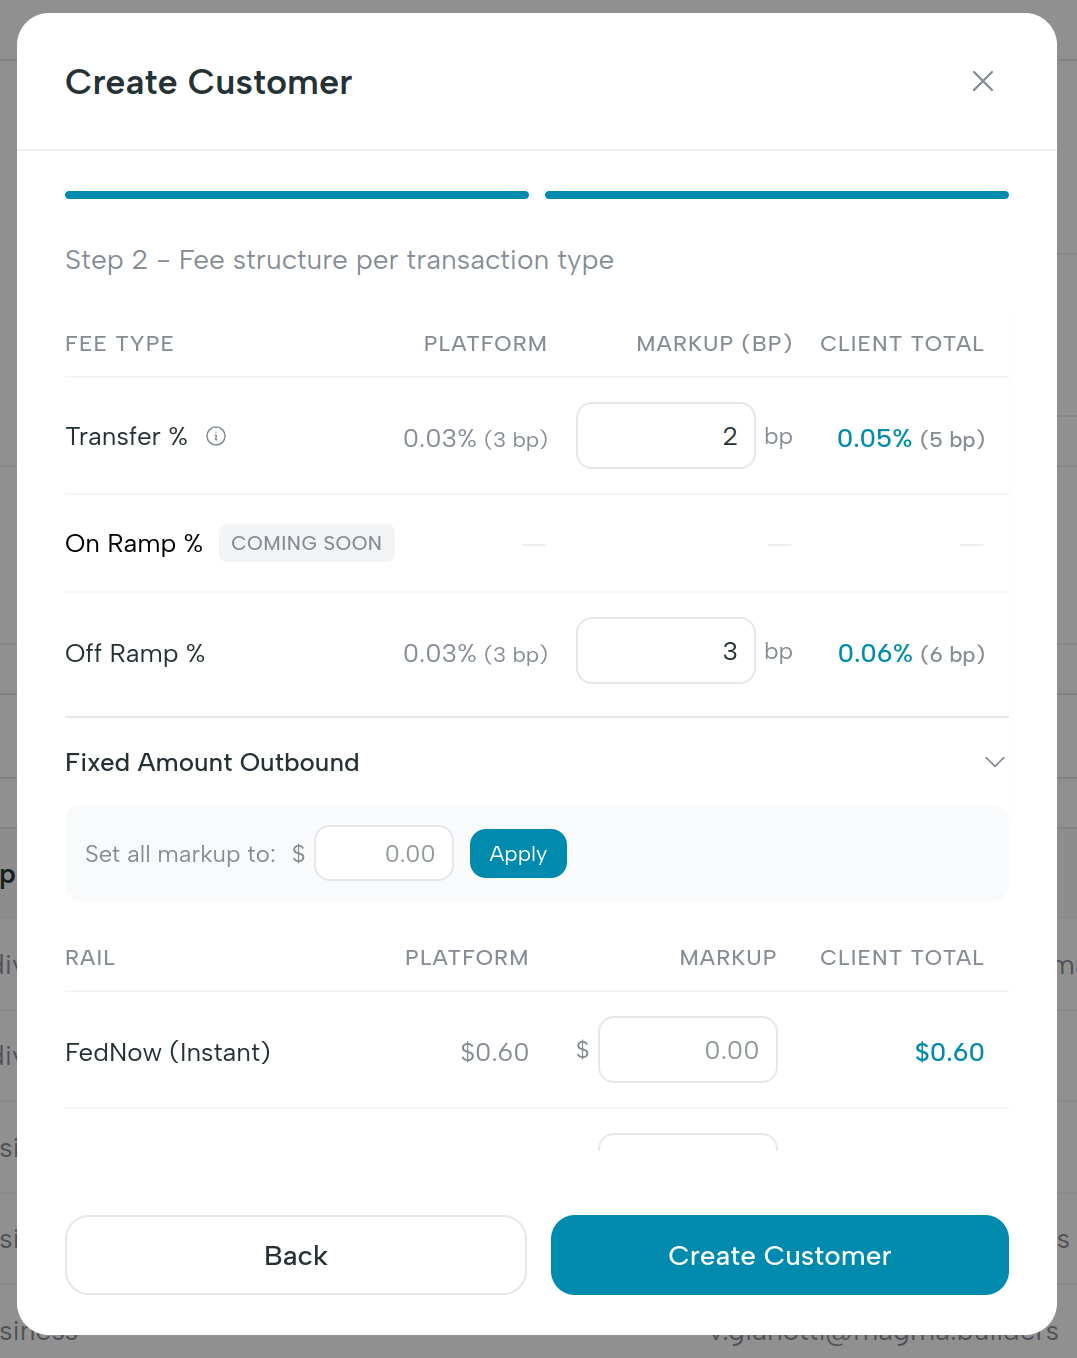
For the full three-tier model and how a payout breakdown is computed, see Fee breakdown.
Submit
Click Create customer. Magma:
- Creates the organization record.
- Stores any non-zero fee markups as overrides.
- Asks the upstream provider to generate a KYC / KYB link for this customer.
- Sends that link to the customer's email via the mailer service.
- Drops you back on the customers list with a success toast: "Customer
created successfully" .
The new customer appears with status created. Once they click the email
link and start verification, the status moves to verifying. See
KYC / KYB status for the full state machine.
What happens behind the scenes
| UI action | Endpoint |
|---|---|
| Submit step 2 | POST /api/v1/organizations |
| Apply non-zero markups | PUT /api/v1/organizations/{id}/fees |
| Email the KYC link | Mailer service (gRPC) |
What's next
- KYC / KYB status - what each status means and what to do at each step.
- Top up a customer - once they're
active, share their virtual account coordinates so they can fund the balance.