Add a fiat recipient
TL;DR - From the Recipients page click Add recipient, choose Fiat → Bank Transfer, pick the customer and account type (ACH / Wire / SWIFT), fill in recipient and bank details, review, and submit.
Step 1 - Click Add recipient
Open Recipients in the left nav and click the Add recipient button in the top right. The wizard opens.
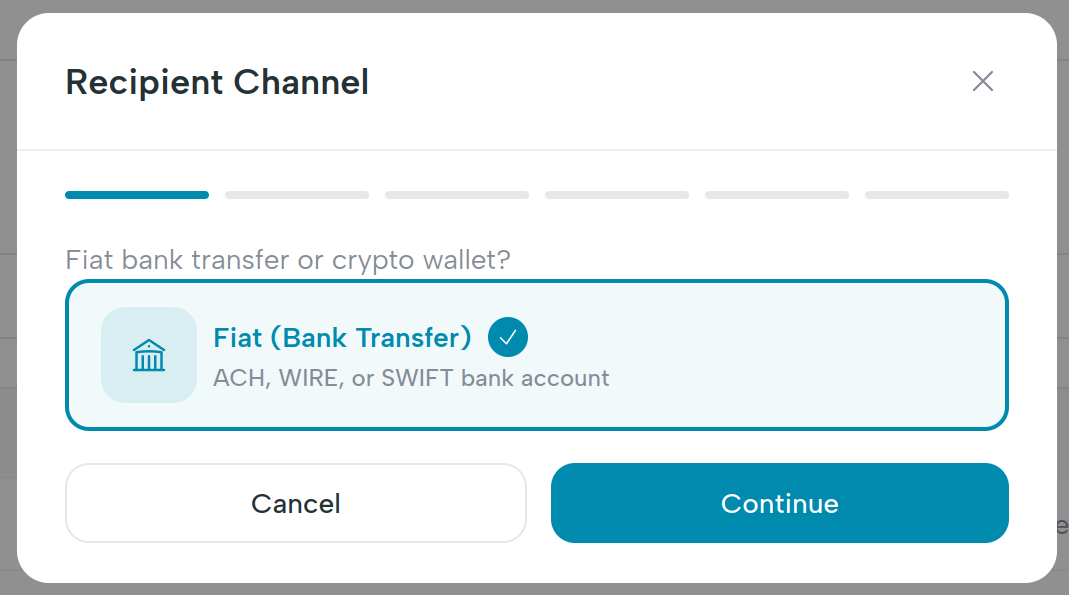
Step 2 - Channel
Pick Fiat (Bank Transfer). Crypto wallets are not supported as recipients in v1.
Step 3 - Type and customer
| Field | Notes |
|---|---|
| Recipient type | Individual or Business. Determines whether you fill first/last name or company name later. |
| Customer | Searchable dropdown of your customers in verified or active status. |
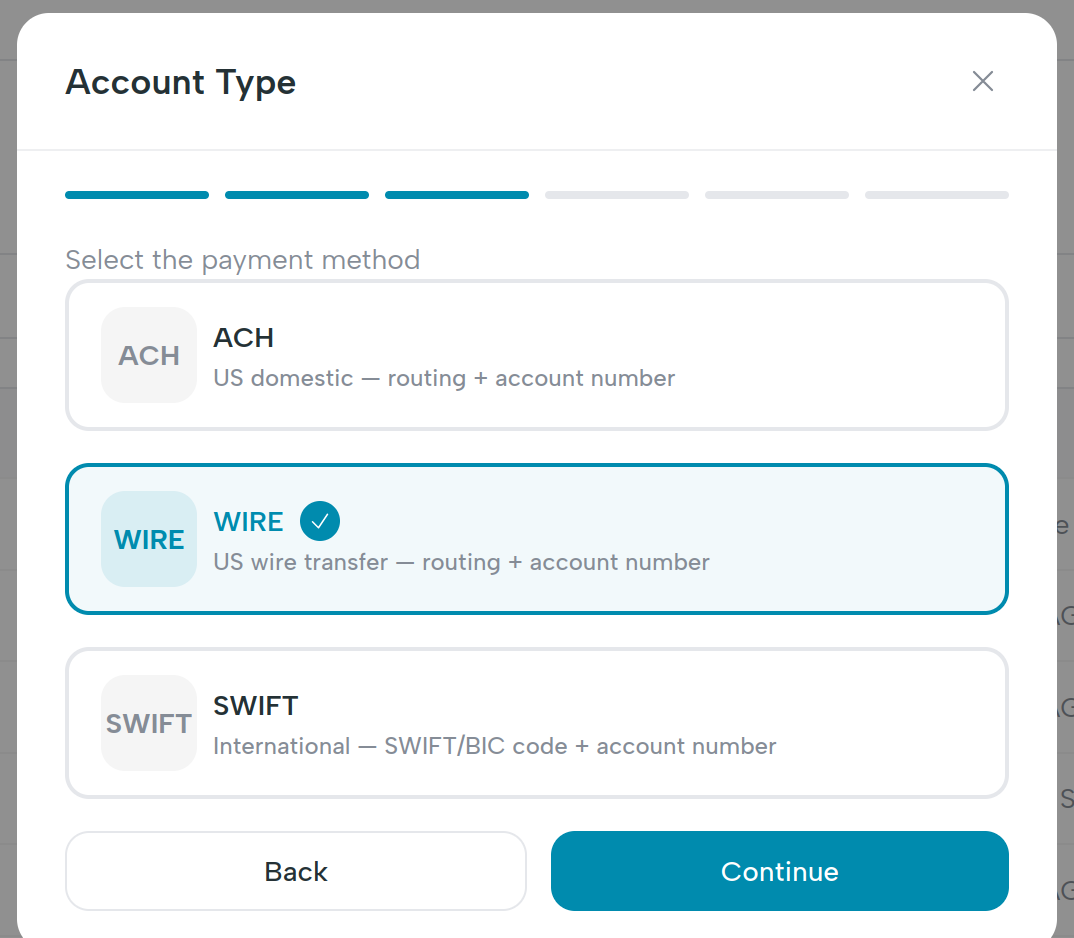
Step 4 - Account type
Three radio cards:
| Type | Required fields downstream |
|---|---|
| ACH | Account number + routing number. |
| Wire | Account number + routing number. |
| SWIFT | Account number + SWIFT/BIC + full bank address. Phone number on the recipient becomes required. Optional intermediary (correspondent) bank routing number when the receiving bank routes through one. |
Step 5 - Recipient details
| Field | Notes |
|---|---|
| First name + Last name (individual) | Required. |
| Company name (business) | Required. |
| Required. Used for notifications and audit. | |
| Phone | Required for SWIFT, optional for ACH and Wire. |
| Address | Optional but recommended. Country and postal code go on the wire metadata. |
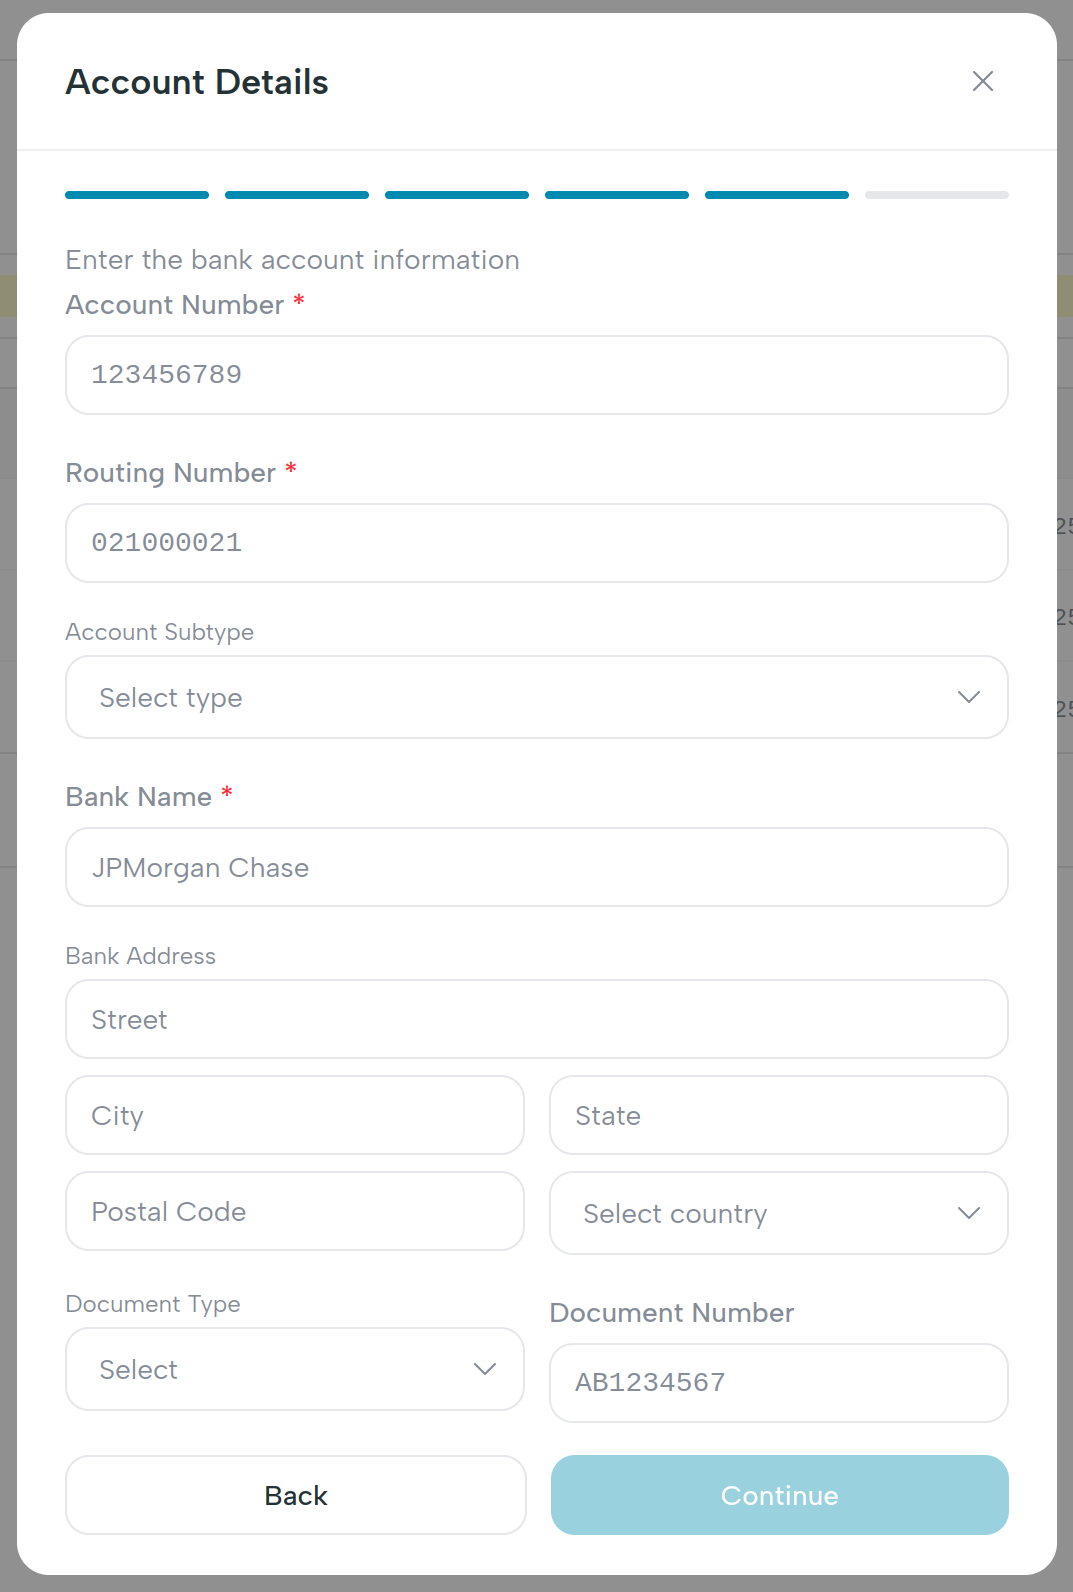
Step 6 - Account details
| Field | Notes |
|---|---|
| Account number | Required. |
| Routing number | Required for ACH and Wire. Hidden for SWIFT. |
| SWIFT code | Required for SWIFT. Hidden for ACH and Wire. |
| Intermediary routing number | SWIFT only, optional. Use when the receiving bank requires routing through a correspondent bank. |
| Bank name | Required. |
| Bank address | Required for SWIFT (postal code + country at minimum). |
| Document type | Dropdown: passport, driver_license, national_id. Compliance requirement. |
| Document number | Required. |
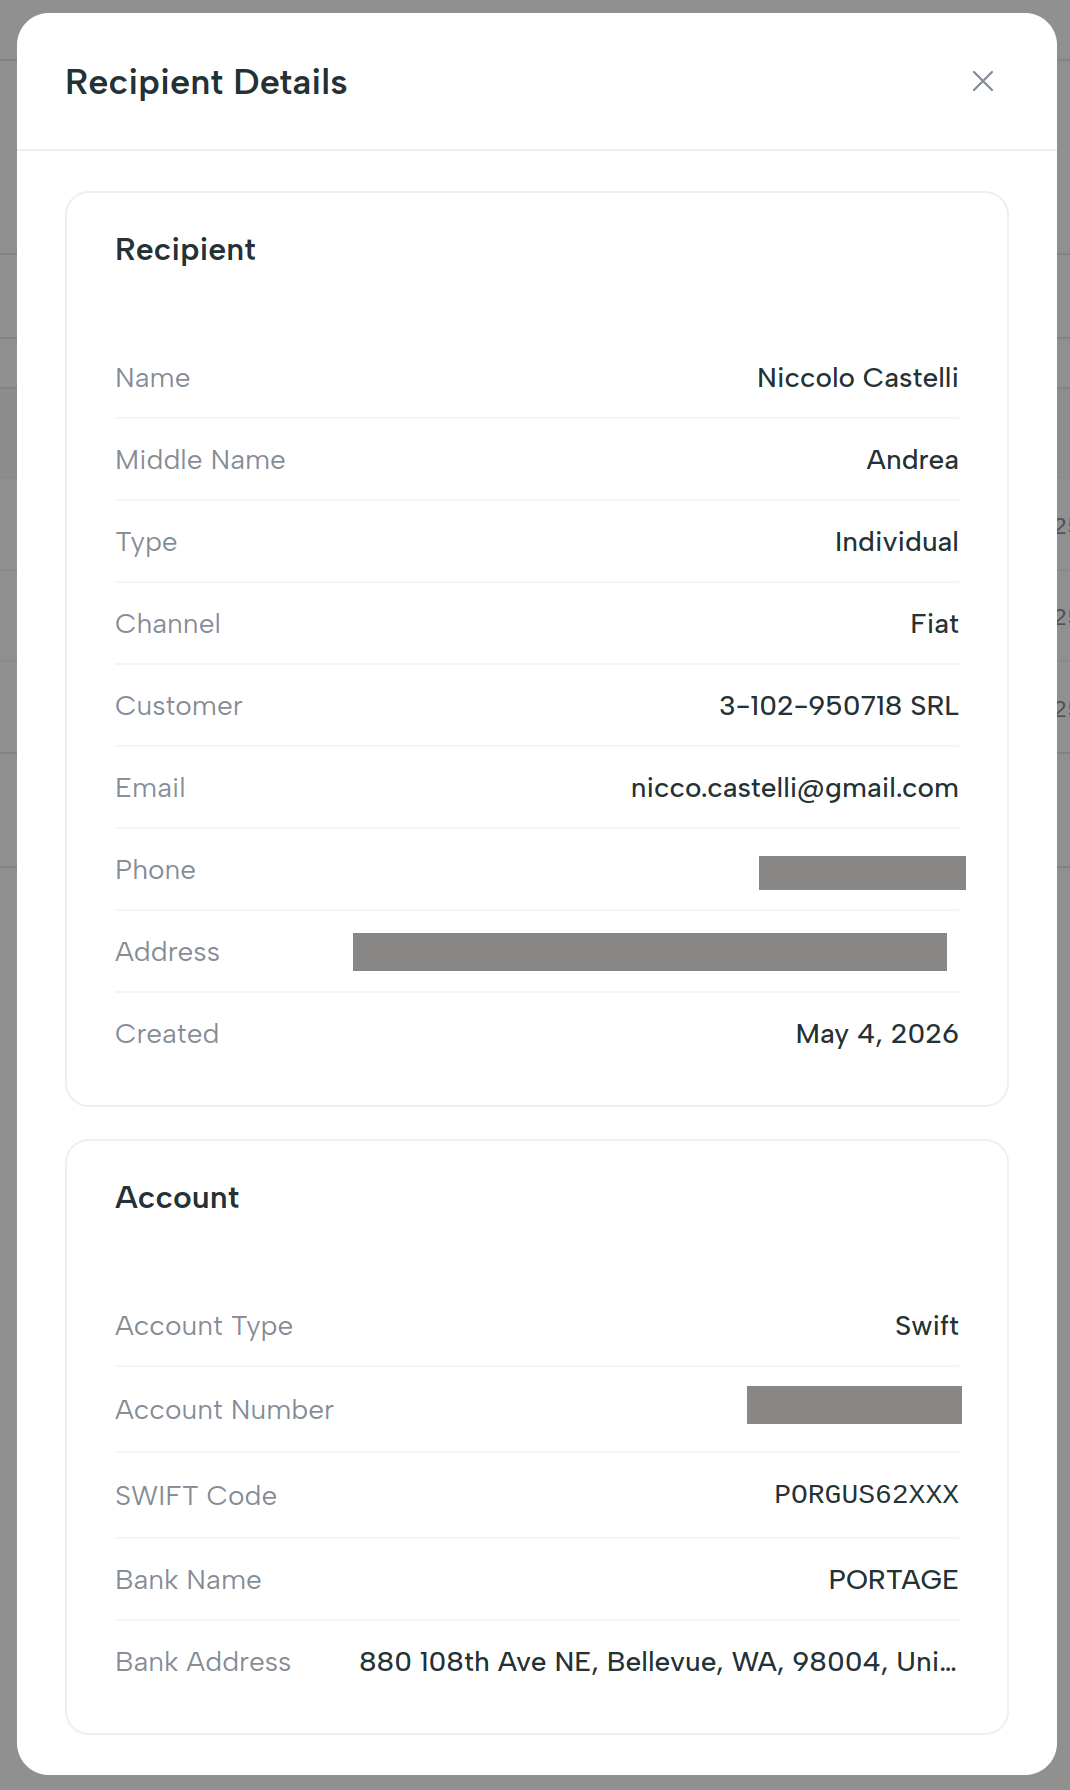
Step 7 - Review
A summary card lists every field for a final read-through. A compliance note reminds you that all recipients are subject to compliance review.
Click Add recipient to submit. A success modal with a green checkmark confirms the recipient name; you can immediately send a payout to them.
What happens behind the scenes
POST /api/v1/organizations/{orgId}/recipients with field names that
match the wizard: accountNumber, routingNumber, swiftCode,
intermediaryRoutingNumber (SWIFT correspondent bank), bankName,
bankAddress, firstName, lastName, email, phone, docType,
docNumber, accountType (ACH / WIRE / SWIFT).
To add the same destination on another customer, run the wizard again and pick the other customer in step 3.
What's next
- Send a fiat payout to this recipient.